Tuesday, June 17, 2014

Baby Room Progress and Inspiration

These days my life has to be planned out really well and I have to stick to that plan.  I have two preschool-aged kids with a baby on the way, a house in the country that's always covered in dirt, a husband to take care of, a business that takes somewhere from 10-15 hours a week and a wild social life to manage. OK, that last part isn't really true but I do have friends that I want to connect with once in awhile!  Because of all of this though, I am really starting to learn how important it is that I set goals, plan ahead and am focused each day so that I can stay on top of my life and not let it get on top of me.  It's a very interesting balancing act but I do enjoy it.  

Why am I telling you all this?  Mainly because in a long-winded way, it relates to how I make time for special projects around the house.  We have several projects we are trying to tackle slowly but simultaneously so that by the time the baby gets here in the end of September, we are mostly settled and ready for his or her arrival. Starting in September and lasting until January, also happens to be the busiest time of year for my business.  So don't be surprised if you see my listening to Christmas Carols and drawing Christmas designs in mid-July.  I want to be ready for the fall retail boom long before baby comes.

That being said, for this baby, I decided to start getting the nursery ready waaaay early in an effort to not have it be a rush at the end when my business is also taking a lot more of my time than usual.  You may have seen on Instagram that I painted the baby's room in April. 

I was really really pleased with how it turned out and still smile every time I step foot in the room.  I used Bedford Gray by Martha Stewart (in Home Depot's Glidden Duo brand) and I absolutely adored the paint and color.  


Choosing a gray paint for a room can turn into a really tricky task pretty quickly which is why I wrote the post Gray Matters for my friend Lindsay over at Moxie Design Studio. I've linked to it here in case you want to pop over and glean some tips from some of my gray-painting experiences.  


Here's a close-up so you can see how the colors plays with the gray-toned floors, white trim and dark gray curtains.  It's a lot of gray right now but that will be changing soon enough.  

Next on my agenda is to paint our Jenny Lind (think curvy spindles) style bed Kelly Green.  I love a pop of color and I love green so this will be a fun project.  The rest of the room will stay neutral but definitely NOT boring.  My goal is to make it feel sophisticated with a touch of whimsy.  I will use industrial elements (like a sweet bronze and black light fixture), some fun art (I'm loving Narwhals for this room-- do you know they are real creatures?) and some modern & vintage furniture pieces that we already own.  I have a couple other fun ideas up my sleeve as well.  


It should come together nicely and hopefully inexpensively as well.  Looking at the Olioboard I designed, I'm thinking my main expenses for this room will be the paint, lighting and artwork.  Not too shabby.

What's your style when you are painting or decorating a room?  Get it all done in a weekend or slowly over time?  Goodwill and junk finds or Pottery Barn and Crate and Barrel?  I'm usually a mix myself.

I'll keep you posted,
Rachel

Wednesday, June 11, 2014

The Vintage and Made Fair -- My First Show!

I started getting serious about my Etsy business last fall.  I designed several things for the 2013 holiday season and it was going pretty well; I loved designing and being able to make some money at the same time.  In January, I found out I was pregnant with our third and spent several months completely sick and exhausted but still so motivated to see my business grow.  During that time, my good friend Tricia, and some of her junkin' friends, announced that they were going to be putting on a "fair" in June showcasing junkers, crafters and handmade artisans from all around the area. I was super excited and signed up anyway, fully knowing I would be sick for awhile and would really have to pull it together to be ready in time.  

Slowly but surely, I found the time to work on my drawings and grow my inventory for the show.  At first, there were many mornings where I laid on the couch and drew because I couldn't muster up the energy to do much else.  Then, over time, I started to feel better and was able to send my kids to a sitter one day a week so I could focus, focus, focus.  

It's been a labor of love and last weekend was the first time showing off all my hard work in person.  The show was so rewarding, encouraging, exciting, draining and just plain FUN.  

Here I am with all my work!!

I used things from around my house to prop up my prints.  I think it gives you an idea of my personal style and makes the tent feel warm and inviting.  

See the drop cloth walls? Yeah, we had to DIY those in just a couple hours and on a budget so that the wind and rain wouldn't get to my work and ruin it over the weekend.  I'm so glad we did because it POURED for 6 hours STRAIGHT on Saturday.  Oi.


I unveiled a new product at the show-- DIY pennant banners (see them in my Etsy Store here).  Customers could come up, choose the letters for anything they wanted to spell, string them on some twine and tie on some vintage fabric tassels.  I was nervous people would think it was too much work to do at a show but it went off without a hitch!


I was SO exhausted after this show.  Obviously, three days of this was a lot of work but additionally, I had such a hard time sleeping each night for various reasons, mostly unrelated to the show.  When it was over on Sunday, I just wanted to crawl into my bed but I also had this overwhelming feeling that I couldn't wait until I could do it again.  There are few things more rewarding than rising to the occasion during a difficult season in your life and meeting your goals.  This business, and all the creating that comes with it, has become one of the greatest joys so far in my life.  

My show was everything I hoped it could be and in so many ways I have to thank my husband.  He has supported my creativity from day one... always allowing me the time to make room for my talent.  He's been my listening ear and helped me with marketing decisions and other shop-related decisions.  He's stayed up late packaging prints with me and learning how to cut dowels perfectly straight to hang canvas prints.  During the show, he was right there beside me the whole time, being fun with the customers, doing a lot of leg work and at the beginning and end, handling a majority of the grunt work to set-up and tear-down.  This is such an image of the man he is... always giving to me, always sacrificing over and over.  I adore him.  

Also, I wouldn't be doing this business if I didn't feel like my Creator had set me on this path. Being a creative visionary type, I have started and stopped so many things but this feels more meant to be with each day.  I have gone to God over and over for vision and discernment with this business.  There were months things weren't jiving and then I would sense Him calling me to focus on a different area of the business and BOOM it was back again.  I can see His hand clearly over this and that has been such an encouragement to me.  

In the night when I wasn't able to sleep on Saturday, I got up and paced the halls of my house for over 45 minutes.  I was feeling sick and just praying and praying I would be well enough to do the show on Sunday.  It was then that I had this overwhelming sense that He was saying He was my Jehovah Jireh or God My Provider.  I walked around in the dark thinking of all the ways He has provided for us in the last year (I'll share more about that sometime) and how this instance wouldn't be any different.  And it wasn't.  Things don't always work out like that, but that night, and in that circumstance, I knew He was about to show me something awesome.  That something awesome being all the joy and pay off of the show.

So, I'll cut the sappy stuff now :)  I just wanted to close by saying I may be addicted to shows after this!  In fact, if you missed this one, I just signed up for my second show on Saturday, July 26th in Valley Junction (Des Moines, IA).  There are more details to come so stay tuned!  

Thanks for all your love and support,
Rachel

Thursday, June 5, 2014

A fresh coat of paint + a headboard facelift

With a baby on the way at the end of September, we've had to do some switcher-roos around the house.  The guest room will be transforming into the baby's room and my daughter Haven's room now has the "old" guest bed.  

Just a few years ago my husband made that bed for our room.  We lived in a small bungalow at the time and our bedroom was literally not much bigger than the size of a bed.  


We had no room for a dresser so he made this bed for storage.  We used this plan from Ana-White.com and it served us well for a few years.  Originally, we made it with drawers but they were cumbersome and never really worked that well.  So this time around, I decided to pitch the never-completely-finished drawers and have some open storage for baskets and toys for my daughter's room.  I also thought they would be a fun opportunity for a pop of color.  


I decided to paint the cubbies Kelly green and just love how this touch adds some fun in a Kate Spade type of way.  It's happy without being too in-your-face.  Plus, I love green.  All the shades.  All the time.


We made the original headboard and covered it in a gray and yellow damask but wanted to liven it up a little bit for a child.  I like to balance sophisticated with kid-friendly when doing a child's room and was inspired by the Floral Fest fabric from HGTV.  

(Before)

(After redo)

To make the headboard, we simply cut a template out of cardboard and laid it over a sheet of plywood.  My husband used a jigsaw to cut the curves around the template and onto the plywood.  And to be honest, the curves were not even on both sides the first time we did it.  I can't remember if we completely started over or just trimmed them a little.  I think if we would have taken our time a little more, it would have come out perfect the first time.  Oh well.  

But I love how it looks now.


Also, this headboard has a funny story with it from when I was covering it in the gray and yellow damask oringally.  That fabric had a repeat that could only go in one direction.  Meaning the 54" width of the fabric was just slightly too narrow to cover the 60" wide piece of plywood.  I couldn't use the length of the bolt because the birds on the fabric ran in a certain direction and they would be sideways if I did.  So I had to use an old white curtain to cover the edges and create a border so the fabric could go the way I needed it to.  It turned out fine but this time around I made sure to grab a fabric that could look right in any direction!    

After my fabric fiasco back in the day, I got the brilliant idea to use nail head trim around the edges of the headboard. It turned out to be a nightmare because I could not, for the life of me, get the silly nail heads hammered in. It was maddening and they were getting all bent and ruined.  

So I did what normal people do, I sat on the floor and cried.  

And then I thought to myself, "Rachel, you never cry over decorating dilemmas, maybe you are pregnant".  Two minutes later, I popped into the bathroom, took a test, and much to my surprise, I WAS!  

So it's only fitting Haven would get to sleep near this headboard after all the trauma it caused me three years ago.  :)


This time around, covering the headboard literally took me 20 minutes.  I had learned from my mistakes, bought a fabric that was easy to manage and didn't try to do any fancy trim.  I simply used a staple-gun to staple the fabric over the existing fabric and batting.  It's just like recovering the cushion on a chair.  Simple.  

I'm pleased with how it all turned out, but honestly, I'm still not totally settled on the headboard fabric.  It's a little crazier than I wanted for her room, but it had the colors I hoped for (kelly green and coral) and it fit my other fabric requirements.  Plus, with two kids and one on the way, I don't have the time or energy to go all over town or scour the internet for "the perfect thing", which I usually find out doesn't exist anyway.

There's no such thing as perfection, right?    


I want to paint the walls a light coral and add a chair, accessories, and wall art to her room.  We bought a used dresser a few weeks ago that needs new knobs... I'm excited to share that with you too.  
It's probably going to take me awhile to get this room finished.  I'm trying to get creative budget-wise and I also have a baby room to work on at the same time.  But as I work, I will show you what I do.  Fingers crossed it's done by September!  

Until next time,
Rachel

Wednesday, June 4, 2014

Busy Bee

I have been working working working for the last several months getting ready for the Vintage and Made Fair coming up this weekend.  It's been fun and I am so excited to do my first show.  It's the inaugural year of the VAMF, a show that combines "junk" and crafty goodness along with good eats and live music.  I think it will be a hit in the Des Moines area.  


I signed up in February and one day a week while the kiddos are at the sitters, I've been brainstorming, drawing, digitizing, printing, and packaging.  It's been such a blessing to be able to devote that time to strengthening my business, dreaming up new products and envisioning the future.  

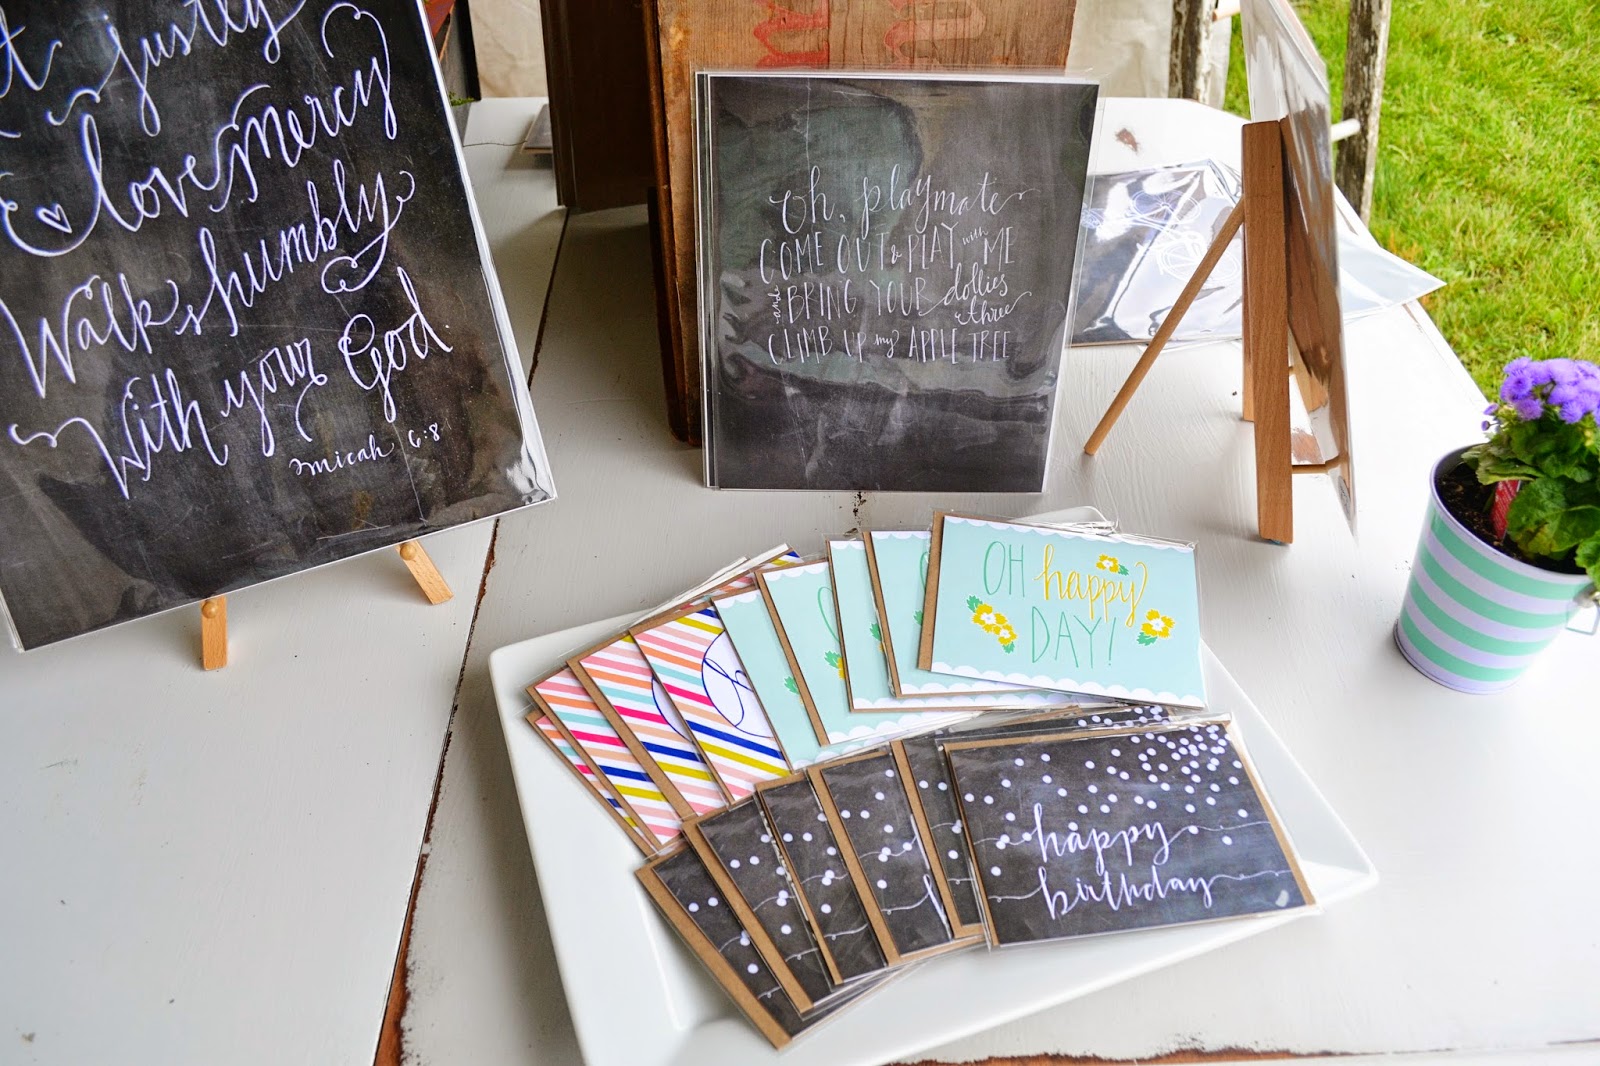
Here's a glimpse to some of the items I've been working on and what I will be taking to the show. This is just a small fraction of everything I have.  


I'm also introducing a few new products at the show (not pictured here).  If you are in the area, I'd love to see you there, and if you aren't able to come, everything new will be up in my Etsy shop immediately following the weekend.  

Excited and nervous at the same time,
Rachel

Tuesday, April 29, 2014

A pantry makeover in progess

One of my least favorite areas in our entire house has been our pantry.  It's awkwardly shaped, the shelving is exposed to the kitchen (so I see our mess all the time), it's where our back door is located so people often find themselves in this messy room upon entering our home, and despite being a walk-in room it doesn't provide for a lot of storage.

I've been staring at it every day since we moved to our house last summer at a loss for what to do with the room.  I've even debated if I should nix the whole pantry idea all together, buy an armoire for food storage and make the room a little office nook.  But alas, we really just need it to be a pantry and I was finally motivated after months of simmering on my ideas to do something about it. 

We've made a noticeable change and it's still a work in progress, but here are/were my goals for this space:
  1. Organize and display food in an attractive way.
  2. Hide the area underneath the microwave that tends to collect random things. 
  3. Make or purchase some sort of cafe door to visually separate the room from the kitchen.
  4. Make it cute.
  5. Stick to a minimal budget. 
I feel really good about my goals but I'm not done with the project yet.  Let's move to the before and after photos so you can see why the room had me pulling out my hair and how it looks now.


This was the view from my kitchen.  As you can see, things were just stuffed wherever, with bread and snacks kept in the wicker drawers and our microwave on the top shelf (there isn’t one in our kitchen), it was pretty much a disheveled mess.

Here it is now: 


I cleared the clutter, got rid of old items and sewed a curtain to hide the random things underneath the shelf.  I put fruits and vegetables in these cute metal baskets from Gordman's.  They were inexpensive and a good size for the area.  I picked up a soda dispenser for my La Croix, too.  I wanted the space to have a grocery market type feel and I think these items help accomplish that.


I pulled out my sewing machine for the first time in two years.  Be proud people.  The curtain is even the same length all the way across :)  You can't tell very well but this is just the sweetest fabric that I found at Hobby Lobby.  It's cream with little black polka-dots and I love it so much!  


The orange extension cord plugs our microwave into an outlet in a nearby closet.  Not my first choice but it was what we had to do with no outlet in the pantry.  I don't want to have to hire an electrician to change this and my husband knows a little about wiring so I'm hoping we can get rid of the large orange cord soon!  

Next up is the wall of doom.  This area bugged me so much-- shallow shelves spilling over with boxes.  Can I emphasize how people are regularly coming and going right past this?  Not my idea of a nice welcome.  


Because I disliked this area so much, it ended up being one of my favorite areas after it was all organized and pretty-fied.  

So, goal number one, organizing and display food in an attractive way, was achieved a few ways. I knew I wanted to use clear plastic storage containers for our frequently-used boxed and bagged items (think cereal, pancake mix, rice, flour) but those puppies can be really expensive ($11-$20 each) when you want to outfit a whole pantry. I had seen some at TJ Maxx and went back to hopefully find several in different sizes. Nope. Not TJ Maxx, or Marshall's or Gordman’s or the second TJ Maxx I went to. The options were slim and just weren’t gonna cut it. 

I wasn’t about to go to Kohl’s or Bed Bath and Beyond and spend $200 on a set or two. So, as a last-ditch effort, I went to my least new favorite store, Wal Mart, to see if they would have anything. I think I heard angels singing in aisle 22 (I actually have no idea what aisle it was) when I found the Better Homes and Gardens version of the Oxo storage containers for a much cheaper price. Glory!


I had so much fun putting my food in these containers.  For a visual person, it was such a treat!  So shiny, so lovely.  I still ooh and ahh when I go in the room-- food never looked so good ;)  


We had jars on our counter for flour, sugar and brown sugar, but they weren't sealed on the rim and the sugar was getting hard.  I decided I would put those things in the new BH&G containers and use the jars elsewhere.  I slipped fruit snacks in one and tea in another-- perfect for something you want to grab quick.  These jars were originally purchased at Target for around $5 each, by the way.

Also, for this area, I purchased a few Fridge Binz at TJMaxx to hold things like popcorn, granola bars and oatmeal.  It keeps those items easily accessible in the mornings.  I'd also like something similar for paper napkins.  


Lastly, in the other corner of the room, behind the purposefully placed blue curtain, was this messy area:


It was a nine-foot-high mess.  Deep, narrow shelves make it difficult for me to see what food we have in there.  The main thing I did here was take every single food item out and place it on the counter to decide what we needed to keep or toss. Some items were expired, some were just never going to get eaten.  

Once the amount of food was under control, it was much easier for me to organize well.  A metal shelf on the bottom allows me to put in extra boxed items.  A tiered organizer on the next shelf up is now organized and helps me see my canned goods easier.  On the top shelf, I used baskets for packets (marinades, powdered ranch) and larger bagged items that don't get used enough to warrant their own clear container.  I already had all these baskets and organizers on hand so this was just about consolidating what I needed and putting it back in an orderly fashion.  


This room makes me so much happier now.  I don't know if it's because I am pregnant or what, but it really seriously made me feel sick when I looked at it! I know, I'm weird. Now, however, I actually like looking into this room from my kitchen.  So much so, that when we tried to put up the cafe doors, I wasn't sure I wanted them there anymore (we will see!).

I smile when I look in this room now and that's a good thing when it comes to a space in your home that you are in multiple times a day.  


I would consider this room 80% finished.  There are still a few things I would like to get to eventually: 
  • Get rid of the orange extension cord
  • Hang some art
  • De-clutter the bin on top of the microwave and hang a storage piece with hooks for Jared's keys and things
  • Possibly hang the cafe doors (unless I just decide I like seeing this room after all)
  • Purchase a rolling cart of some sort for paper towels and other paper products behind the cream curtain
Well, if you are still with me, then you are a trooper!  I hope this was useful for you.  What is your pantry like?  Is it organized or in need of a little TLC?  

Until next time,
Rachel

Wednesday, April 2, 2014

An eclectic bathroom collage

One of the things I had on my to-do list before my pregnancy went into full-swing-sick-mode was putting up some fun art in our downstairs bathroom.  I picked out what I wanted to hang, set it in the bathroom corner and there it sat for close to 3 months while it waited for me to get off the couch and hang some nails. Well this weekend came and I was ready to hang those babies! 

I was inspired by the bathroom collage in Jeanne Oliver's main floor bath (halfway through her post).   Her style is just slightly more rustic than mine but in a lot of ways her house reminds me of mine or ideas I've had for mine.  It was funny because my bathroom was already painted the same color and the tall ceilings are perfect for some art.  I felt like we had the same bathroom!

In our house, this is the bathroom most people use when they come over.  It was already a fun room due to the adorable bowl sink placed on an old sewing table and the unique industrial faucet put in by the previous owner but I wanted to add some of my own touch.  It feels eclectic and old and I hoped to reflect that in the art I hung.  


I chose a mix of textures, colors, shapes and images.  I didn't want it to look matchy-matchy but like it had evolved over time.  Most of the prints and frames I already had.  A few things I was given recently and the mint metal medallion and old wooden clipboard are from my favorite vintage shop in town-- Vintage No. 35 (though I might be a little biased on this).  


The bathroom is teeny-tiny so it was super hard to get in a place where I could take photos.  I think I was curled up on the sink at this point.  But I contorted my body in an effort to be able to show you the corner half of the room.


There's a floral tapestry I bought at Goodwill, a photo of a French garden found in a recent issue of Southern Living Magazine, a spring bike printable from my Etsy shop and a jar of button flowers I placed inside a blue shadow box and secured with a dab of glue from my glue gun. 

The little shelf is from a friend and is a cute fit for the room and my mini-succulent. The butterfly print was a gift from Jared and is just sitting there until I find a frame for it.

I wanted one more thing and ran to my art room for some ideas. I ended up framing some vintage key burlap in a mint hoop I bought at Goodwill last year. 


The egg print is a reprint from a vintage textbook and the frame is one I found at Goodwill and painted.  The wooden "JOY" sign I have had for awhile and next to that is a little stitching that says "Bless your Heart" done by my friend Jayme's mom.  The white frame on top is from IKEA and has a photograph of a potting station from a recent Better Homes and Gardens issue. 


My friend Maggie (made?) the chalkboard tags and mailed them to me in a pretty package with a bunch of other adorable things while I was sick.  I liked the idea of something in the bathroom other than frames and this was the perfect "something".  

I'm still looking for something cute to hang on the clipboard.  Maybe something with writing.  Not sure.  

I hope to add to this wall over time.  There's a lot more space I could hang things on.  But for now, it looks fine and as I see things that will go, I may hang them.  I also love that I can change out some of the art for the different seasons.  I had a whole different set of prints and photographs to hang when I thought I was going to be doing this in the winter.  Oh well, winter will always come again!

Until next time,
Rachel