Thursday, June 26, 2014

5 keys to a successful Etsy shop

It's taken awhile but slowly over time I have learned some important aspects to having a successful Etsy shop.  I am continually learning, but  wanted to share with those of you interested in starting a shop or newer to the Etsy community, what I have come to know along the way in hopes it helps you in your business endeavors.


#1 Have good, clean photographs with natural lighting--

Having good photographs of your product is the most important thing you can do for your Etsy shop.  People have no way of seeing your product in real life so this is your only opportunity to show them how good it looks.  I don't know about you, but if a shop doesn't have good photography or if I can't really see what I am buying, I won't.  I can't stress to you how important this is.

If you don't have a digital SLR just take the best photos you can with the best camera you have.  Even if it's an iphone.  You'd be amazed at what you can get from an iphone with just a little editing.  Always place products near a window or in a room with good natural light.  Never ever use a flash when photographing and never take photos after the sun goes down.  I use Pioneer Woman's Photoshop Action set to help me edit my photos-- I only ever use the boost and slight lighten actions.  If you have Photoshop Elements, she also has an elements version available.


Etsy's front page

Keeping it simple is a good rule of thumb.  Taking photos on a plain white background is completely acceptable and can even be a good thing.  One of the best ways to get recognized on Etsy is by making it to the front page in a treasury... look closely and you'll notice what ends up on the front page are products with good lighting, simple backgrounds and little to no props.  Also, if it's something wearable, a model is important too.

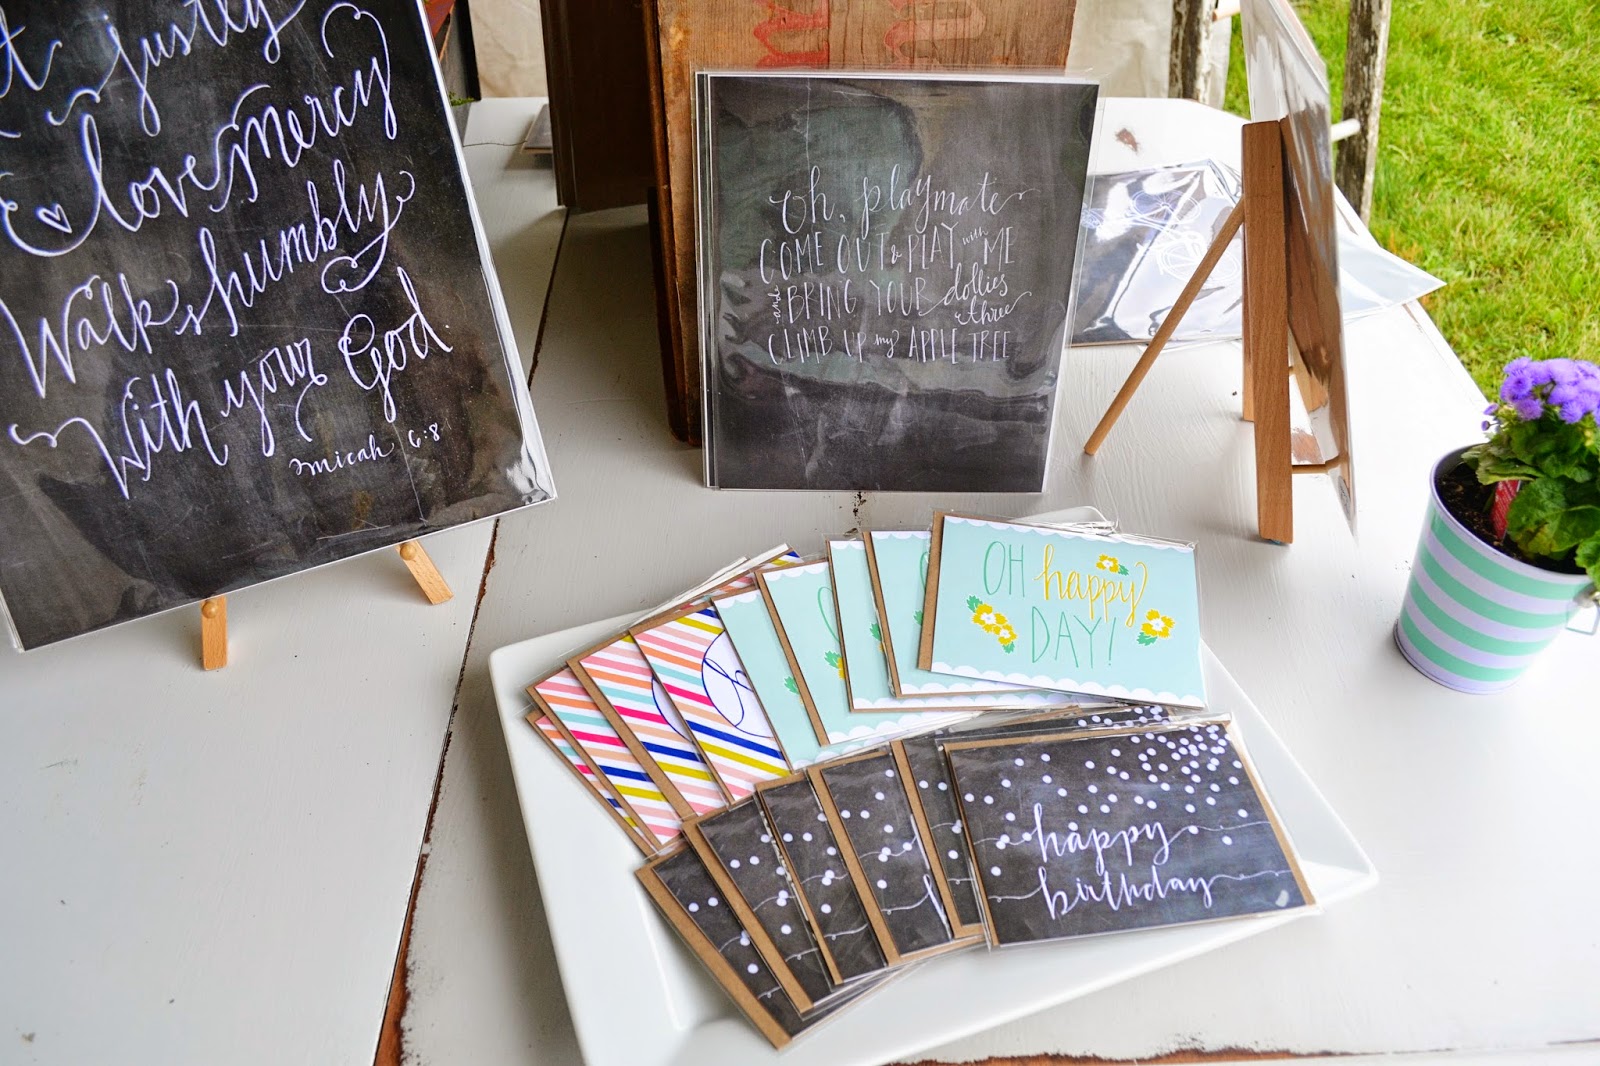
IF you do use props in your photos, make sure you are intentional about what you place in them.  They need to make sense and fit with the image or brand of your shop.  They can help you if you do them right but if you are nervous about this, just start out with a simple backdrop.


I love the Bees Knees Shoppe design (I also think her products are so adorable!).  Everything in her shop is cohesive from her colors, to her products to her logo and even the custom listing images.  Her shop makes me want to buy something from her because it looks put together.  She does a great job using props that help highlight her products without taking away from them.  


Mint Home has fabulous furniture pieces that stand on their own.  I like the simplicity of their listing photos with just a simple or white background.  This method really makes each piece pop because there are no competing elements.

Finally, don't fret if your photographs aren't coming out the way you'd like.  You will learn as your shop grows and as long as the photos are decent, you will get sales.  Take a Skillshare class to help you tighten up your photography skills if need be.

#2 You need a clear style--

Equally as important to good photos is having a vision and brand for your shop.  If you don't know what you're selling or how you want it to look to others, they won't know either. Is your shop whimsical? Vintage? Industrial? Preppy? A mix of things?  Whatever it is, make sure it's reflected in a nice logo and any other branding you have in your shop.


Pencil Shavings Studio has some of the best branding out there. You know exactly what they are about just by looking at their shop banner and a few listings.  Everything works together and speaks to their preppy/colorful/whimsical style.

If you sell multiple types of things in your shop, make sure they make sense together (like the shop above!).  You can sell clothes and photographs in one place but they should somehow be connected.  If you owned a brick and mortar shop, you would have a concept of who you were selling to and the look you wanted for your shop in it's decor, branding, style and feel, products etc.  Keep that in mind with your Etsy shop too.  Make sure your shop styling makes sense and that the items you are selling fit together.  I wouldn't sell vintage records and handmade soap in one shop but that's just me.

#3 Choose awesome tags and titles-- 

When choosing a title for your listing, make sure you are using search terms that people are looking for.  If you are posting a handmade bib for a boy-- "baby boy bib" would be a great starting point.  Don't make up a cute nickname for it like "Oliver's Favorite Bib" because no one is looking that up on Etsy, and search is the primary way people will find your items there.  It seems bland and boring but this is all about SEO and SEO brings buyers and buyers bring sales.

From there, use as many words in your title as you can to describe your piece.  For example you may continue with "Guitar Print Fabric, Baby Shower Gift, Gift Set" and therefore your whole title could be "Baby Boy Bib, Guitar Print Fabric, Blue and Green, Hipster Boy, Baby Shower Gift, Gift Set, New Baby Gift".  It's long but it works.

To know what people are searching for, simply start typing a term into the Etsy search bar.  For this example, you could type "bib" and see what other's are pairing with the word "bib" when they are searching.  Put those items in your titles with the most important words at the front of your titles.

Little Low Studio is a shop with good titles on their listings that are sure to be directing buyers to them (I also love their shop styling and photography too).

In addition to good titles, it is key to make sure all the important words in your title are also in your tags. This gives each word more weight when Etsy is searching how relevant your items are to the person looking. So for my imaginary listing I would tag: baby boy bib, baby boy, blue, baby shower, gift, handmade, etc.  I would keep going until I had used up all 13 tags.

Over time you can watch your shop stats and see what people are searching to find you and then edit your listing accordingly.  Try new words and phrases on a couple listings once in awhile, you never know what will be popular!

#4 Make sure to market outside of Etsy--

If you are doing your tags and titles well, Etsy search will drive a majority of your traffic. But Etsy alone is not enough to have a thriving shop.

Pinterest is an awesome way to get your product beyond Etsy's walls.  It's OK to pin your own designs.  I have some prints that friends have pinned to their Pinterest boards that have brought in a lot of hits and sales.  So far with my business, Pinterest has always brought in the most traffic aside from Etsy.

Facebook is fine but it used to be better.  I would continue to market on Facebook but I wouldn't put all my effort there.  In the last several months Facebook has limited who can see your shop's business page.  It can be very difficult to get your "likers" to see your stuff on a regular basis unless you are willing to pay to "boost" your post.  I've never done this but I have heard it's completely not worth it. Your personal page will have better luck reaching others but if you use it too much, you can get busted by Facebook.

Nonetheless, Facebook is still a great way to tell people about what you are doing. Try a variety of post types from links to status updates to photos-- some are more popular than others.  I often find that Facebook tends to bring in sales from friends and family that might not otherwise know what I was up to.

Instagram is a really fun way to show others what you are making, it's like a mini-blog and is quick and simple.  I find it's so much more rewarding than Facebook when trying reach my followers. It's a great way to interact with others, there's a lot of creative people and it's a super encouraging environment.  Others find me and the pictures I post by searching different hashtags (#etsy, #etsyshop, #handlettering) and then can head to my Etsy store because of the link I have in my profile. MAKE SURE to have good and styled photos on IG, similar to what I said about your Etsy shop photos, people here expect things to look nice. (Natural lighting!!!!)

I find IG is really good for networking and getting to know other designers/crafters/creatives out there too.  It's inspiring and is by far my favorite social media platform.

Follow me @SereneDesign ;)

Markets and Shows are super fun and can be a huge boost to your business.  Besides selling your product, you can make new customers, meet existing ones, make new friends with other small business owners and possibly get invited to other shows.

I'm new to shows myself but for now I would simply say, get yourself out there and be intentional.  Research the shows you sign up for and make sure your items fit in with the feel of the show. Also make sure the show is well marketed and the people running it seem to know what they are doing. There's nothing worse than doing a show and losing money in the end because no one shows up or the attenders are not searching for the types of items you are selling.  Sad day.

#5 Keep it fresh-- 

There's discrepancy out there as to whether or not you need to re-list items on Etsy or post new ones to get more hits to your shop.  It used to be that was entirely how you drove traffic to your shop-- with people re-listing their items multiple times a day. However, since each time you list something it's 20 cents, the shops with small budgets complained.  Now search is based on relevancy, not recency, so re-listing has little to no effect on people finding your items.  Which is another reason why good tags and titles are now so important.

All that to say, I do think it's important to keep adding things to your shop.  The more you have the more likely people will find you (there's simply more out there to be found) and it keeps your shop looking new and fresh.  People like to see that you have new products in the works and are continually creating.  Give them something new to buy-- you never know when you will land on a new design idea that propels your business forward.

I hope this helps and is informative for those newer to Etsy.  It sure makes me want to redesign my shop some, which I plan to do in the coming months. If you have any questions, don't hesitate to leave a comment or email me!

Good luck,
Rachel

Thursday, June 19, 2014

New in Shop: Fourth of July Banners

I have loved the new customizable pennant garlands in my Etsy shop so much that I decided to do some Fourth of July themed ones.  These make me smile.  


Right now I am offering these 3 pre-made styles, but you can really choose whatever patriotic phrase you want.  For example: "Stars and Stripes", "Old Glory", "USA" etc.


Stripes, dots and stars.

Stripes, dots and canvas.

Just stripes and dots.

Want more star strips or more canvas?  Just convo me on Etsy and I can basically put it together the way you want it using the materials shown.  

These are so fun and festive!  I want one in every room of my house.

What do you think?  Do you decorate for the Fourth?  Well if not, now you should ;)

Xoxo,
Rachel

Tuesday, June 17, 2014

Baby Room Progress and Inspiration

These days my life has to be planned out really well and I have to stick to that plan.  I have two preschool-aged kids with a baby on the way, a house in the country that's always covered in dirt, a husband to take care of, a business that takes somewhere from 10-15 hours a week and a wild social life to manage. OK, that last part isn't really true but I do have friends that I want to connect with once in awhile!  Because of all of this though, I am really starting to learn how important it is that I set goals, plan ahead and am focused each day so that I can stay on top of my life and not let it get on top of me.  It's a very interesting balancing act but I do enjoy it.  

Why am I telling you all this?  Mainly because in a long-winded way, it relates to how I make time for special projects around the house.  We have several projects we are trying to tackle slowly but simultaneously so that by the time the baby gets here in the end of September, we are mostly settled and ready for his or her arrival. Starting in September and lasting until January, also happens to be the busiest time of year for my business.  So don't be surprised if you see my listening to Christmas Carols and drawing Christmas designs in mid-July.  I want to be ready for the fall retail boom long before baby comes.

That being said, for this baby, I decided to start getting the nursery ready waaaay early in an effort to not have it be a rush at the end when my business is also taking a lot more of my time than usual.  You may have seen on Instagram that I painted the baby's room in April. 

I was really really pleased with how it turned out and still smile every time I step foot in the room.  I used Bedford Gray by Martha Stewart (in Home Depot's Glidden Duo brand) and I absolutely adored the paint and color.  


Choosing a gray paint for a room can turn into a really tricky task pretty quickly which is why I wrote the post Gray Matters for my friend Lindsay over at Moxie Design Studio. I've linked to it here in case you want to pop over and glean some tips from some of my gray-painting experiences.  


Here's a close-up so you can see how the colors plays with the gray-toned floors, white trim and dark gray curtains.  It's a lot of gray right now but that will be changing soon enough.  

Next on my agenda is to paint our Jenny Lind (think curvy spindles) style bed Kelly Green.  I love a pop of color and I love green so this will be a fun project.  The rest of the room will stay neutral but definitely NOT boring.  My goal is to make it feel sophisticated with a touch of whimsy.  I will use industrial elements (like a sweet bronze and black light fixture), some fun art (I'm loving Narwhals for this room-- do you know they are real creatures?) and some modern & vintage furniture pieces that we already own.  I have a couple other fun ideas up my sleeve as well.  


It should come together nicely and hopefully inexpensively as well.  Looking at the Olioboard I designed, I'm thinking my main expenses for this room will be the paint, lighting and artwork.  Not too shabby.

What's your style when you are painting or decorating a room?  Get it all done in a weekend or slowly over time?  Goodwill and junk finds or Pottery Barn and Crate and Barrel?  I'm usually a mix myself.

I'll keep you posted,
Rachel

Wednesday, June 11, 2014

The Vintage and Made Fair -- My First Show!

I started getting serious about my Etsy business last fall.  I designed several things for the 2013 holiday season and it was going pretty well; I loved designing and being able to make some money at the same time.  In January, I found out I was pregnant with our third and spent several months completely sick and exhausted but still so motivated to see my business grow.  During that time, my good friend Tricia, and some of her junkin' friends, announced that they were going to be putting on a "fair" in June showcasing junkers, crafters and handmade artisans from all around the area. I was super excited and signed up anyway, fully knowing I would be sick for awhile and would really have to pull it together to be ready in time.  

Slowly but surely, I found the time to work on my drawings and grow my inventory for the show.  At first, there were many mornings where I laid on the couch and drew because I couldn't muster up the energy to do much else.  Then, over time, I started to feel better and was able to send my kids to a sitter one day a week so I could focus, focus, focus.  

It's been a labor of love and last weekend was the first time showing off all my hard work in person.  The show was so rewarding, encouraging, exciting, draining and just plain FUN.  

Here I am with all my work!!

I used things from around my house to prop up my prints.  I think it gives you an idea of my personal style and makes the tent feel warm and inviting.  

See the drop cloth walls? Yeah, we had to DIY those in just a couple hours and on a budget so that the wind and rain wouldn't get to my work and ruin it over the weekend.  I'm so glad we did because it POURED for 6 hours STRAIGHT on Saturday.  Oi.


I unveiled a new product at the show-- DIY pennant banners (see them in my Etsy Store here).  Customers could come up, choose the letters for anything they wanted to spell, string them on some twine and tie on some vintage fabric tassels.  I was nervous people would think it was too much work to do at a show but it went off without a hitch!


I was SO exhausted after this show.  Obviously, three days of this was a lot of work but additionally, I had such a hard time sleeping each night for various reasons, mostly unrelated to the show.  When it was over on Sunday, I just wanted to crawl into my bed but I also had this overwhelming feeling that I couldn't wait until I could do it again.  There are few things more rewarding than rising to the occasion during a difficult season in your life and meeting your goals.  This business, and all the creating that comes with it, has become one of the greatest joys so far in my life.  

My show was everything I hoped it could be and in so many ways I have to thank my husband.  He has supported my creativity from day one... always allowing me the time to make room for my talent.  He's been my listening ear and helped me with marketing decisions and other shop-related decisions.  He's stayed up late packaging prints with me and learning how to cut dowels perfectly straight to hang canvas prints.  During the show, he was right there beside me the whole time, being fun with the customers, doing a lot of leg work and at the beginning and end, handling a majority of the grunt work to set-up and tear-down.  This is such an image of the man he is... always giving to me, always sacrificing over and over.  I adore him.  

Also, I wouldn't be doing this business if I didn't feel like my Creator had set me on this path. Being a creative visionary type, I have started and stopped so many things but this feels more meant to be with each day.  I have gone to God over and over for vision and discernment with this business.  There were months things weren't jiving and then I would sense Him calling me to focus on a different area of the business and BOOM it was back again.  I can see His hand clearly over this and that has been such an encouragement to me.  

In the night when I wasn't able to sleep on Saturday, I got up and paced the halls of my house for over 45 minutes.  I was feeling sick and just praying and praying I would be well enough to do the show on Sunday.  It was then that I had this overwhelming sense that He was saying He was my Jehovah Jireh or God My Provider.  I walked around in the dark thinking of all the ways He has provided for us in the last year (I'll share more about that sometime) and how this instance wouldn't be any different.  And it wasn't.  Things don't always work out like that, but that night, and in that circumstance, I knew He was about to show me something awesome.  That something awesome being all the joy and pay off of the show.

So, I'll cut the sappy stuff now :)  I just wanted to close by saying I may be addicted to shows after this!  In fact, if you missed this one, I just signed up for my second show on Saturday, July 26th in Valley Junction (Des Moines, IA).  There are more details to come so stay tuned!  

Thanks for all your love and support,
Rachel

Thursday, June 5, 2014

A fresh coat of paint + a headboard facelift

With a baby on the way at the end of September, we've had to do some switcher-roos around the house.  The guest room will be transforming into the baby's room and my daughter Haven's room now has the "old" guest bed.  

Just a few years ago my husband made that bed for our room.  We lived in a small bungalow at the time and our bedroom was literally not much bigger than the size of a bed.  


We had no room for a dresser so he made this bed for storage.  We used this plan from Ana-White.com and it served us well for a few years.  Originally, we made it with drawers but they were cumbersome and never really worked that well.  So this time around, I decided to pitch the never-completely-finished drawers and have some open storage for baskets and toys for my daughter's room.  I also thought they would be a fun opportunity for a pop of color.  


I decided to paint the cubbies Kelly green and just love how this touch adds some fun in a Kate Spade type of way.  It's happy without being too in-your-face.  Plus, I love green.  All the shades.  All the time.


We made the original headboard and covered it in a gray and yellow damask but wanted to liven it up a little bit for a child.  I like to balance sophisticated with kid-friendly when doing a child's room and was inspired by the Floral Fest fabric from HGTV.  

(Before)

(After redo)

To make the headboard, we simply cut a template out of cardboard and laid it over a sheet of plywood.  My husband used a jigsaw to cut the curves around the template and onto the plywood.  And to be honest, the curves were not even on both sides the first time we did it.  I can't remember if we completely started over or just trimmed them a little.  I think if we would have taken our time a little more, it would have come out perfect the first time.  Oh well.  

But I love how it looks now.


Also, this headboard has a funny story with it from when I was covering it in the gray and yellow damask oringally.  That fabric had a repeat that could only go in one direction.  Meaning the 54" width of the fabric was just slightly too narrow to cover the 60" wide piece of plywood.  I couldn't use the length of the bolt because the birds on the fabric ran in a certain direction and they would be sideways if I did.  So I had to use an old white curtain to cover the edges and create a border so the fabric could go the way I needed it to.  It turned out fine but this time around I made sure to grab a fabric that could look right in any direction!    

After my fabric fiasco back in the day, I got the brilliant idea to use nail head trim around the edges of the headboard. It turned out to be a nightmare because I could not, for the life of me, get the silly nail heads hammered in. It was maddening and they were getting all bent and ruined.  

So I did what normal people do, I sat on the floor and cried.  

And then I thought to myself, "Rachel, you never cry over decorating dilemmas, maybe you are pregnant".  Two minutes later, I popped into the bathroom, took a test, and much to my surprise, I WAS!  

So it's only fitting Haven would get to sleep near this headboard after all the trauma it caused me three years ago.  :)


This time around, covering the headboard literally took me 20 minutes.  I had learned from my mistakes, bought a fabric that was easy to manage and didn't try to do any fancy trim.  I simply used a staple-gun to staple the fabric over the existing fabric and batting.  It's just like recovering the cushion on a chair.  Simple.  

I'm pleased with how it all turned out, but honestly, I'm still not totally settled on the headboard fabric.  It's a little crazier than I wanted for her room, but it had the colors I hoped for (kelly green and coral) and it fit my other fabric requirements.  Plus, with two kids and one on the way, I don't have the time or energy to go all over town or scour the internet for "the perfect thing", which I usually find out doesn't exist anyway.

There's no such thing as perfection, right?    


I want to paint the walls a light coral and add a chair, accessories, and wall art to her room.  We bought a used dresser a few weeks ago that needs new knobs... I'm excited to share that with you too.  
It's probably going to take me awhile to get this room finished.  I'm trying to get creative budget-wise and I also have a baby room to work on at the same time.  But as I work, I will show you what I do.  Fingers crossed it's done by September!  

Until next time,
Rachel

Wednesday, June 4, 2014

Busy Bee

I have been working working working for the last several months getting ready for the Vintage and Made Fair coming up this weekend.  It's been fun and I am so excited to do my first show.  It's the inaugural year of the VAMF, a show that combines "junk" and crafty goodness along with good eats and live music.  I think it will be a hit in the Des Moines area.  


I signed up in February and one day a week while the kiddos are at the sitters, I've been brainstorming, drawing, digitizing, printing, and packaging.  It's been such a blessing to be able to devote that time to strengthening my business, dreaming up new products and envisioning the future.  

Here's a glimpse to some of the items I've been working on and what I will be taking to the show. This is just a small fraction of everything I have.  


I'm also introducing a few new products at the show (not pictured here).  If you are in the area, I'd love to see you there, and if you aren't able to come, everything new will be up in my Etsy shop immediately following the weekend.  

Excited and nervous at the same time,
Rachel